Table of Contents
Ceramic coating is the latest revolution in car care, providing external enhancement and protection for your vehicle. Historically, applying a ceramic coating was reserved for professionals, but now DIY enthusiasts can also coat their cars themselves to give them all those benefits of being professionally done. This guide is not just an instruction manual but also reveals all those secret tricks about DIY ceramic coating for you to really enjoy that shine in your car without actually paying for all that it’s worth.
What Is Ceramic Coating?
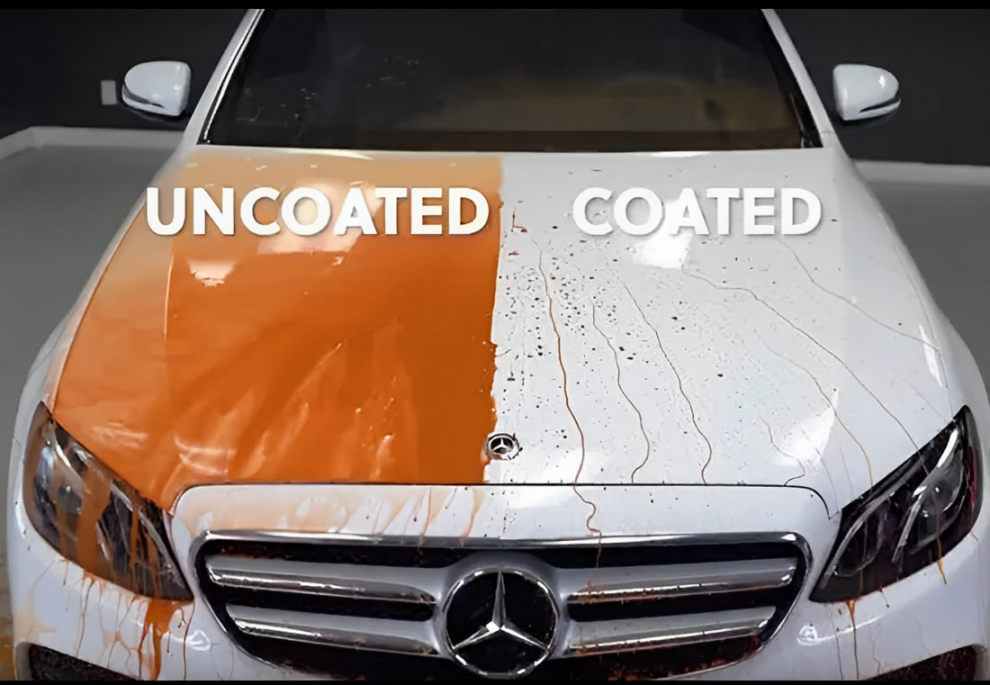
What one needs to know before proceeding with the application process is that the ceramic coating is not something like a simple wax or sealant, but a semi-permanent bond that adheres to the paint of an automobile, resulting in a thick, hydrophobic coat on the surface of the car. Not only does this coat make the paint glossier and deeper, but it also protects the paint from UV, foreign particulate matter, and minor scratches.

Advantages of DIY Ceramic Coating
Cost-effectiveness is one of the key reasons to opt for DIY ceramic coating. A person can invest their time and energy into it and get equivalent results to those obtained from detailing professionals. DIY application also means one is free to do the job in the manner one prefers. One gets to attend to every detail and inch of the vehicle, actualizing maximum protection and enhancement.
Preparation Steps
To achieve a perfect ceramic coating, thorough preparation should be done before anything. Here are the critical fundamental steps to be taken:
Washing and Decontaminating: Start by washing your vehicle to remove all dirt, grime, and residues. Clay bar treatment is the next procedure that will eliminate all embedded contaminants that could affect the bonding process with the coating.
Surface Correction: Assess the paint for imperfections such as swirl marks or light scratches. Use a polish or compound to correct these issues before proceeding to ceramic coating application.
Surface Inspection: After correction, conduct a final check to ensure cleanliness and smooth paint under proper lighting conditions. The presence of defects could affect the quality of the coating and the duration of its efficiency.
DIY Ceramic Coating Application
We now get down to the nitty-gritty details of applying DIY ceramic coating:
Gather Your Supplies: You will require a quality ceramic coating product, applicator pads, microfiber towels, and some gloves to keep your palms clean.
Application Procedure: Take a bit of ceramic coating on the applicator pad and work it into small sections while using an overlapping method for coverage. Once the coating is applied, allow it to flash (haze) before buffing off excess with a clean microfiber towel.
Layering: To add protection and shine, applying multiple layers of ceramic coating may be beneficial. Follow all manufacturers’ instructions regarding curing times between layers.
Curing: Follow the manufacturer’s instructions regarding curing times. Usually, a ceramic coating takes about 24 to 48 hours to cure fully, and during that time, avoid exposing it to water or any strong chemicals.
Maintenance Tips: For prolonged activity of homemade ceramic coatings, wash regularly with pH-neutral car shampoos, avoiding all such cleaning techniques that may be abrasive.
Additional Tips and Advanced Techniques-IV
Here are some advanced tips and techniques for the true builders of a DIY ceramic coating:
Surface Preparation: Much more attention can be given to paint correction using tools like dual-action polishers for better swirl mark and scratch removal.
Temperature and Humidity: The optimal application conditions will depend on the product. Always look into the temperature and humidity recommendations for the best application.
Application of Top Coat: Some ceramic coating systems come with a top coat that enhances gloss while adding a layer or two of protection; application instructions should be followed for all individual product applications.
The Future of DIY Ceramic Coating
With time and technological advancements, the DIY ceramic coating product is morphing into a friendlier tool for enthusiasts with more durability and gloss retention. Keeping up with innovations and techniques will be beneficial for the overall enhancement of your DIY detailing skills.
Conclusion
DIY ceramic coating certainly transforms not just the looks of the car but also the protection that it gives against the elements. Follow the steps and techniques to create a showroom finish right from your home garage. Let the power of DIY ceramic coating complement your beloved vehicle with the best shine and durability.
This is why DIY ceramic coating is a great way for automotive enthusiasts looking to bring cost savings and satisfaction to the art of preserving and improving their vehicles. With this information about the application, including advantages, maintenance tips, and much more about the purposes of this guide, you are set on the right path to achieving DIY ceramic coating.
FAQs:
Q: How hard is it to use ceramic coating on your own?
A: DIY ceramic coating requires a lot of preparation as well as detail, but with the right set of instructions and practice, an enthusiast can produce results that will be as good as or better than those of the professionals.
Q: Is it possible to coat a car with ceramic on every surface?
A: Ceramic coatings are specifically for painted surfaces, but you can still apply it to a host of other materials such as glass and wheels; choose a coating made for each surface rather than trying to apply just one product to all types.
Q: What maintenance should I apply to my car after DIY ceramic coating?
A: Maintain your ceramic-coated vehicle with regular washes in pH-neutral car shampoos using microfiber wash mitts. Do not use automatic car washes with abrasive brushes; they end up degrading the coating over time.
Q: Does self-applied ceramic coating offer protection from bird droppings and tree sap?
A: Yes, even ceramic coatings give a sacrificial layer to a vehicle. These coatings help against bird poop and tree sap and other contaminants. However, if these contaminants stay on the surface, it is recommended that they be cleaned promptly to avoid etching.